Quick Start
Assembly
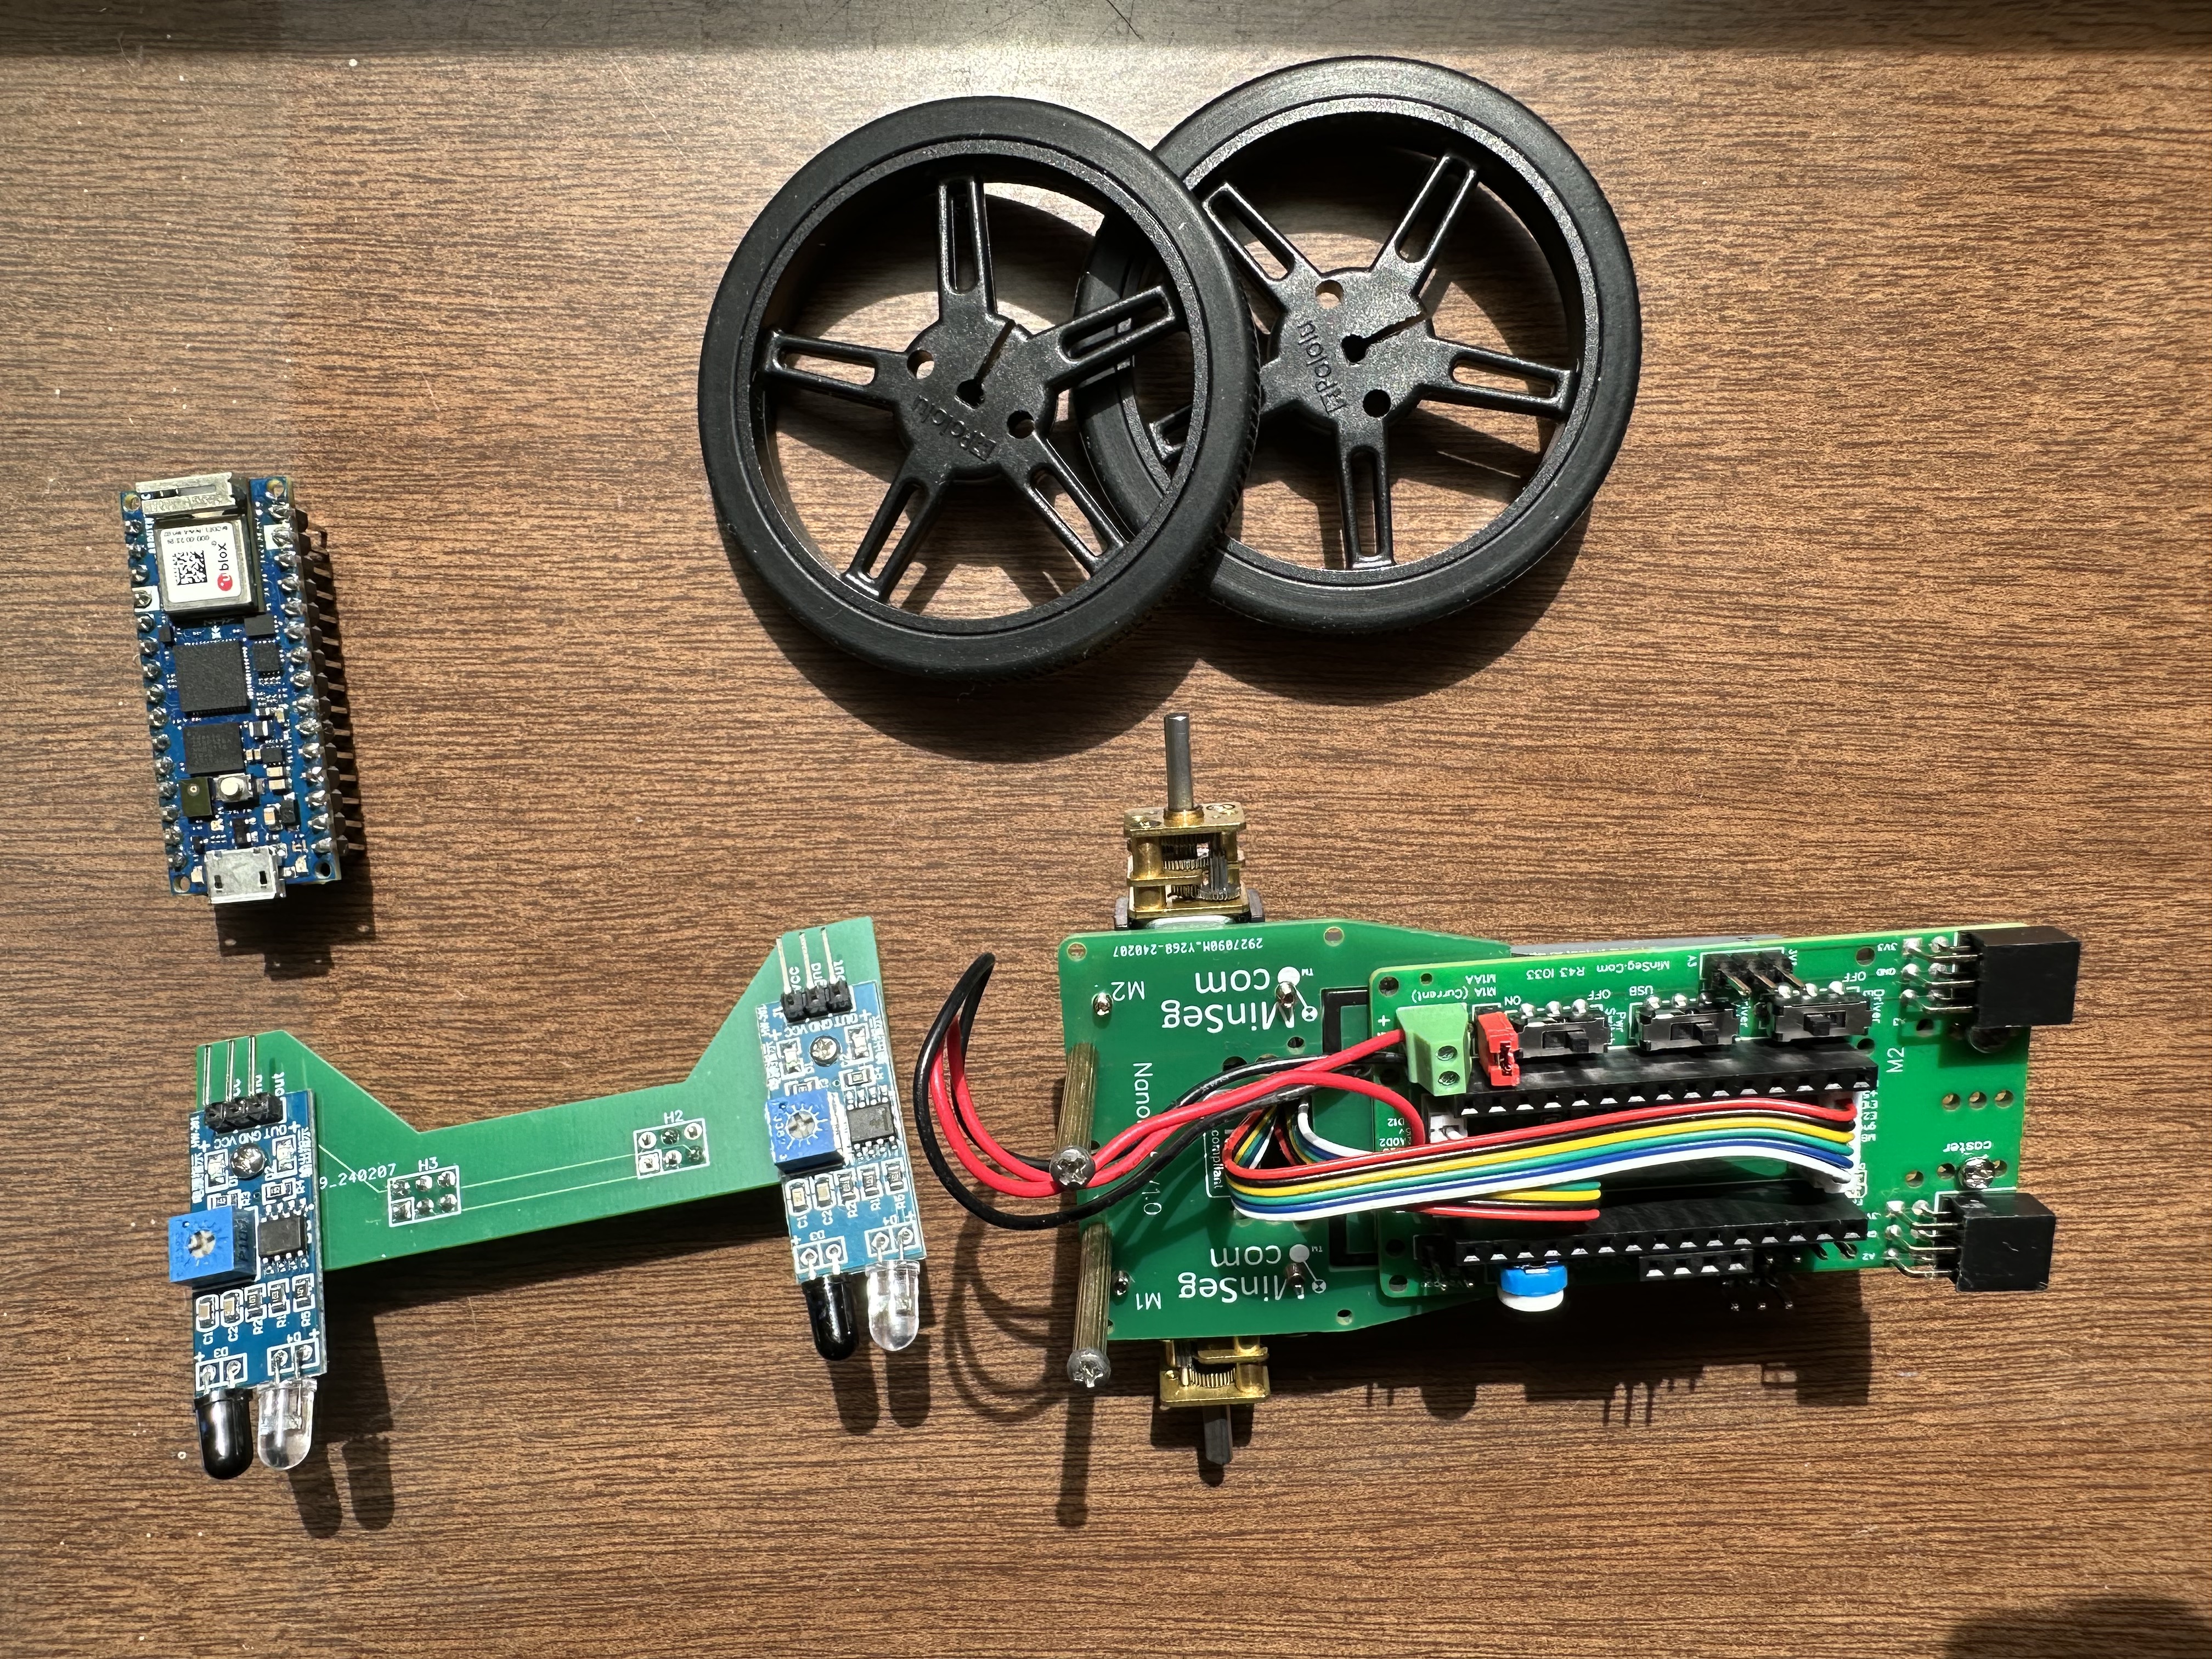
The kit has 5 main parts: the IR sensor bar, Arduino Nano RP2040, wheels, battery (not shown), and MinSeg board. To assemble:
Insert the battery into the MinSeg kit. This could be a tight fit, so be careful! Line up the terminals first, then rock the battery into place.
Place the Arduino Nano RP2040 on top of the MinSeg kit. Each pin on the Arduino aligns with a connector on the MinSeg kit. Make sure the microUSB connector is facing forwards.
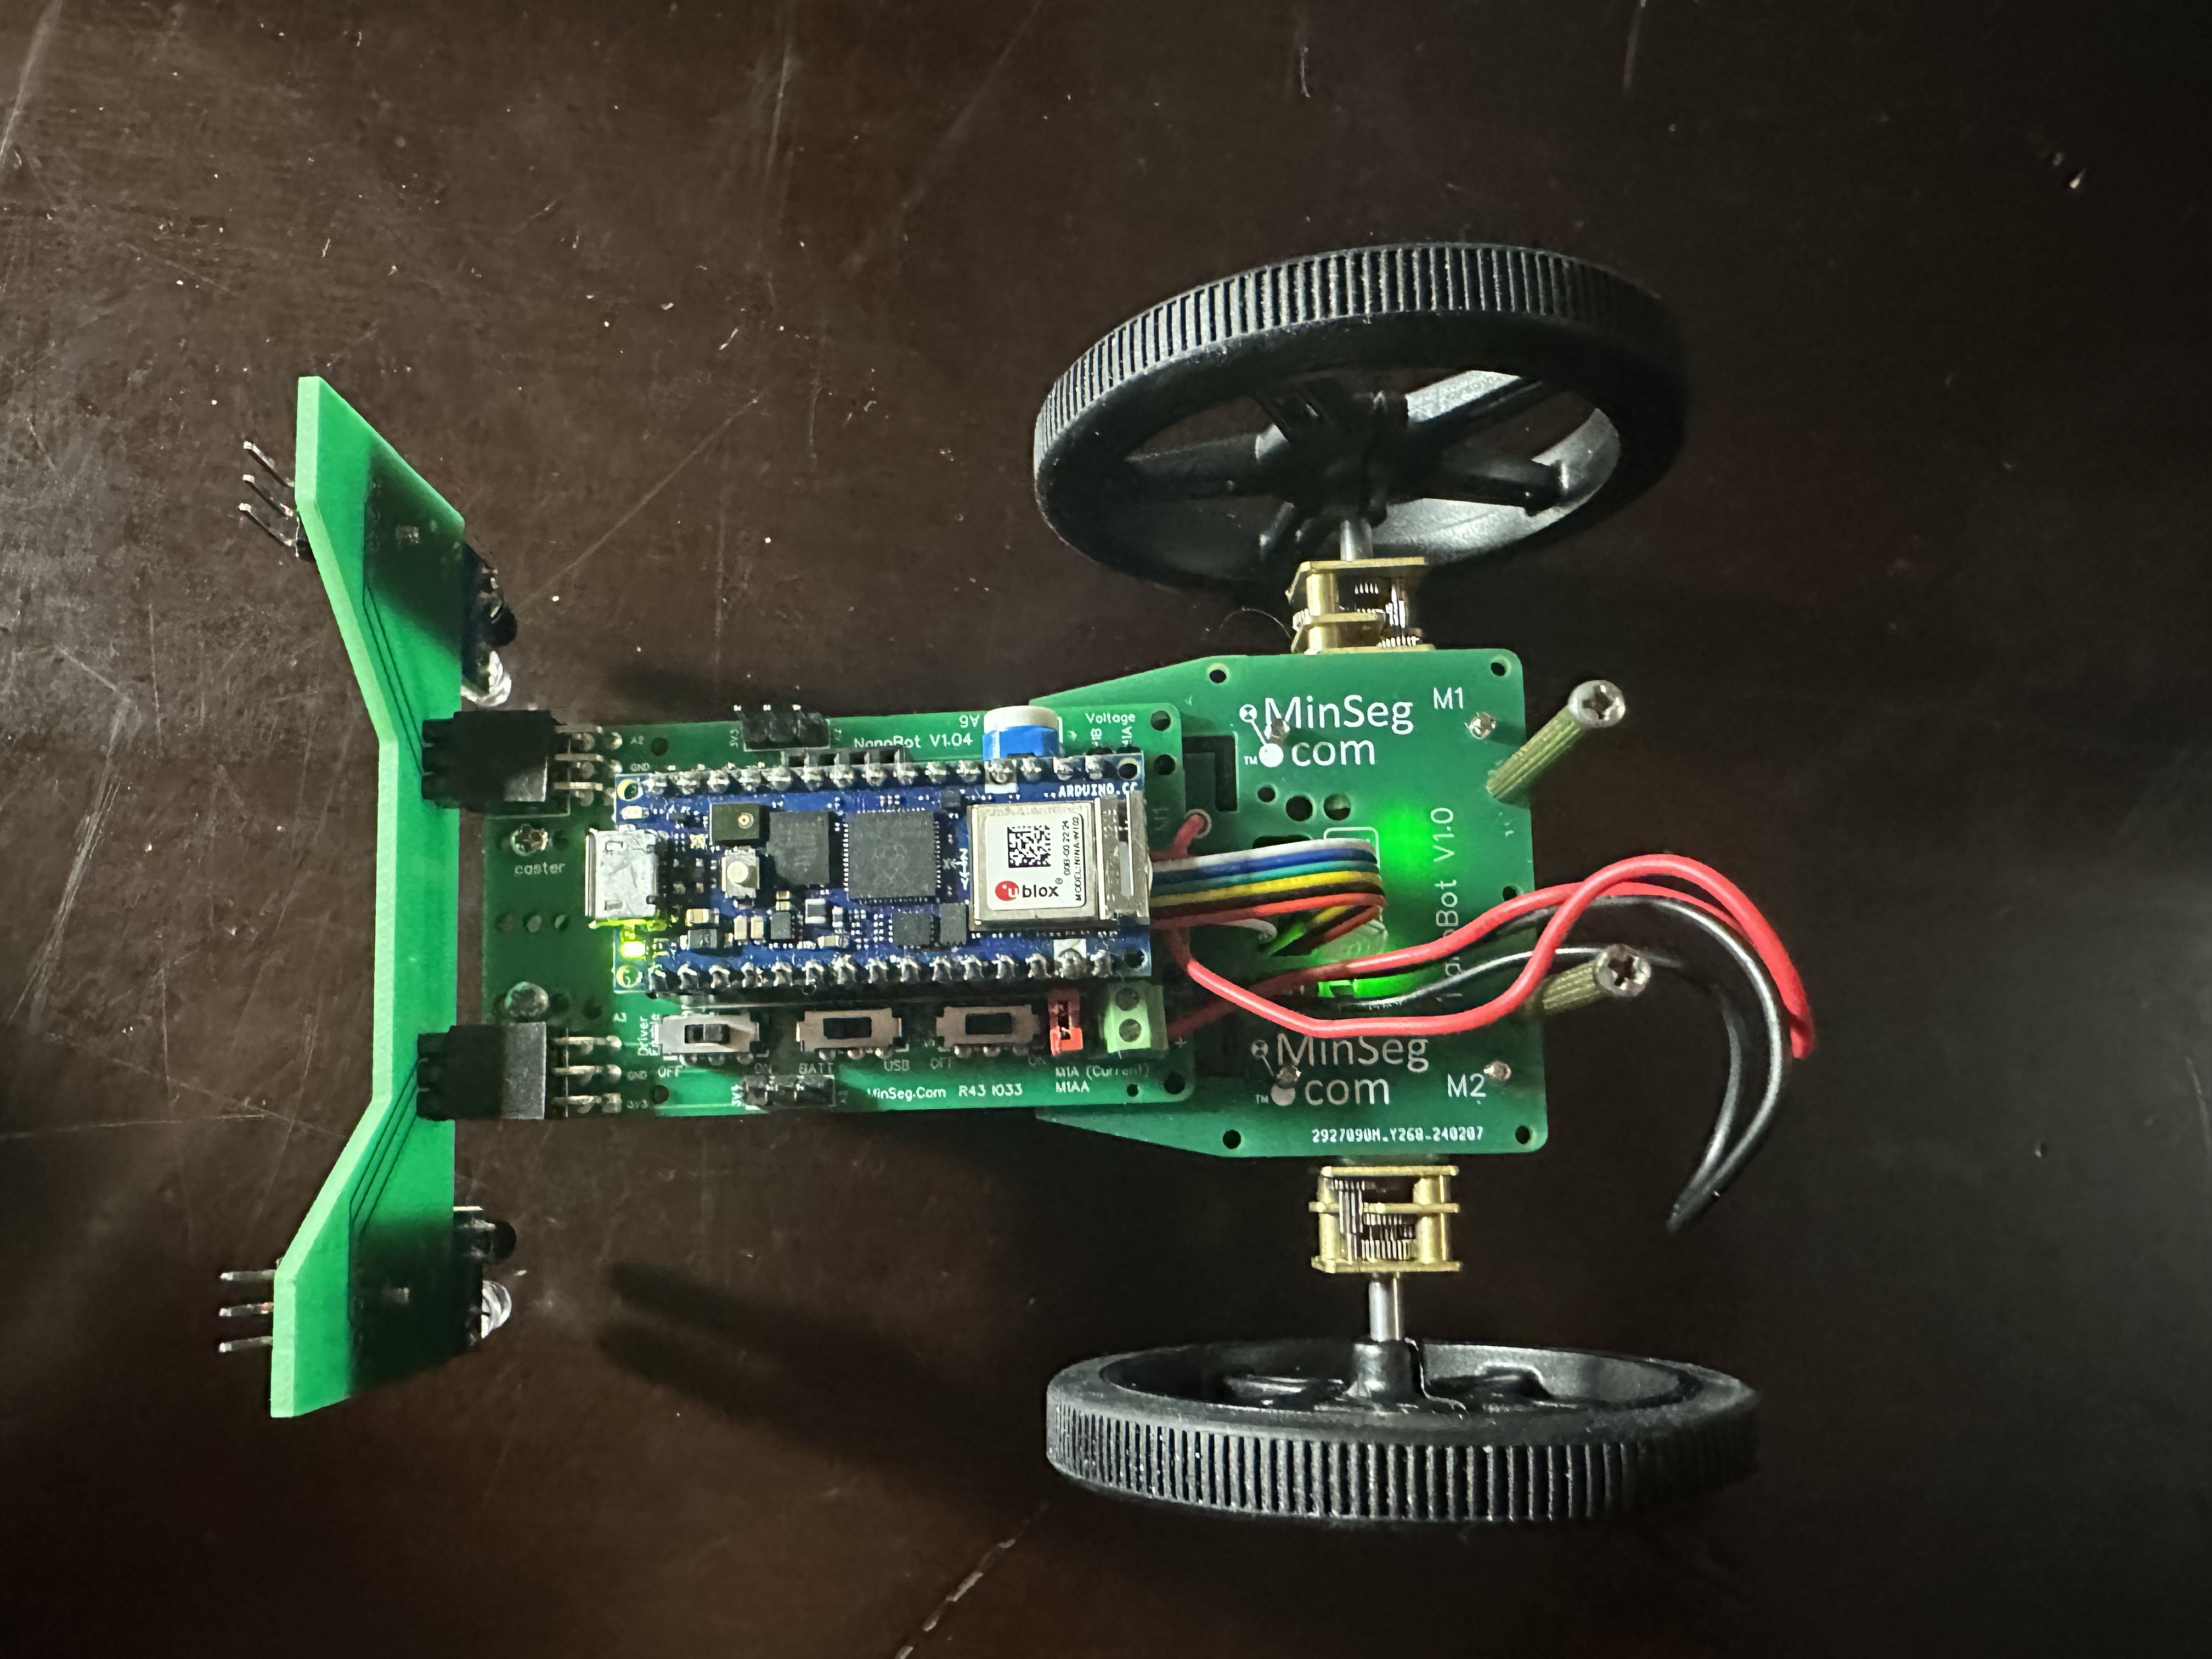
Slide the IR sensor bar into the front of the MinSeg board with the IR sensors facing downwards. Correct orientation is crucial to avoid reversing polarity and burning out the LEDs.
Slide the wheels onto the motor shafts. Align the flat side of the wheel with the flat side of the motor shaft. If needed, orient the outward bump as shown below:

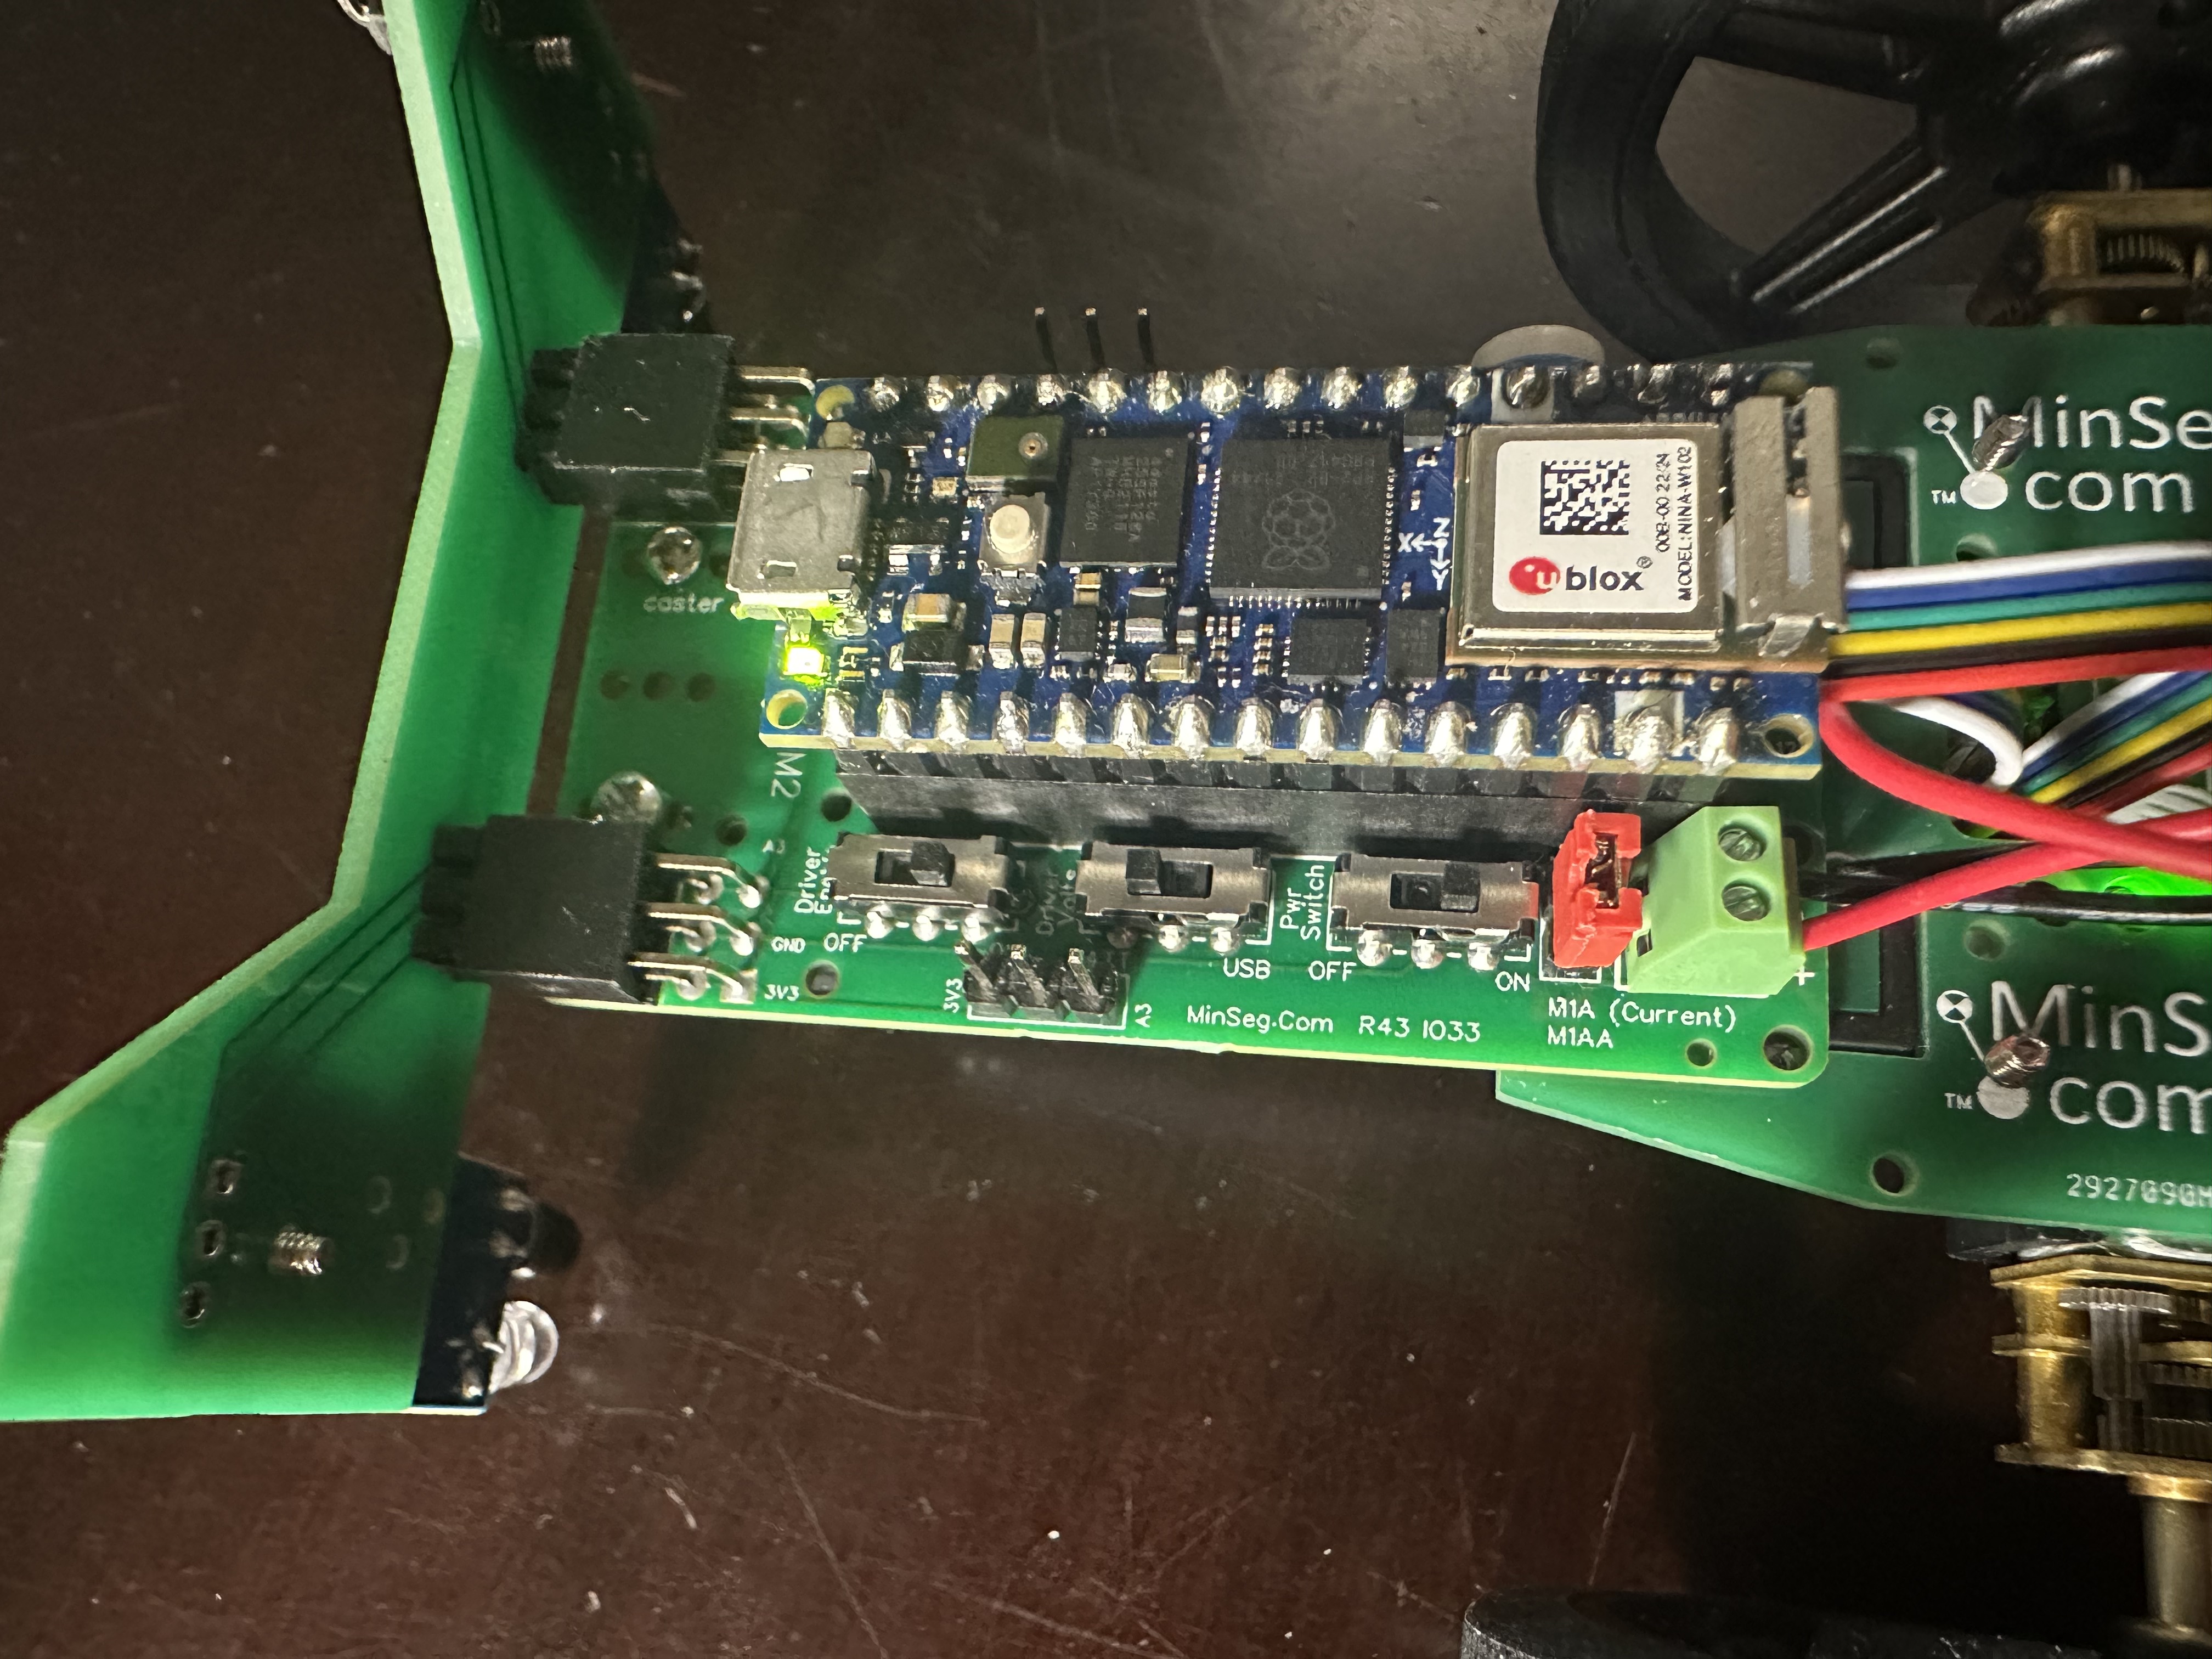
Check the three switches on the left side of the MinSeg board: “Pwr Switch”, “Driver Volts”, and “Driver Enable”. - Flip the Power Switch on. Lights should appear on the Arduino, MinSeg board, and IR sensors. - Flip Driver Enable to ON to allow the Arduino to drive the motors. - Set Driver Volts to Battery Power to use the battery instead of your laptop.
With this, your kit is ready to go!
Installation
Download Arduino Lab for MicroPython: Arduino Lab for MicroPython. This is the environment for transferring MicroPython code to the Arduino.
Install a Bluetooth Low Energy (BLE) scanning app on your mobile device. Recommended apps: BLE Scanner or LightBlue.
Download the NanoNav starter code:
nanonav_starter.zip. Extract the files, including nanonav.py and ble_advertising.py.
The ble_advertising.py file comes from MicroPython’s GitHub repository: MicroPython BLE.
Workflow Using Arduino Lab for MicroPython
Create a folder for your MicroPython code. Include nanonav.py, ble_advertising.py, and main.py.
Open Arduino Lab for MicroPython. Use File → Open to open main.py.
Connecting to the Arduino over USB
Connect your Arduino to your computer via USB.
In Arduino Lab, click the Connect button (top left).
If prompted to update firmware, click OK. If you see an error about failing to connect, toggle the mode on the board by single-pressing the small white button on top of the Arduino (see Troubleshooting for more details).
Once connected, your Arduino will appear as an external drive (Windows Explorer, Mac Finder, etc.), typically named “NO NAME” or “USB Drive”.
Copy the files from your MicroPython code folder to the Arduino drive.
Note
Copy the files from the starter folder directly to the Arduino drive (not the folder itself).
Running Your Code
You have two options:
Laptop Mode: Early stages
Keep the Arduino connected to the computer.
Click Run in Arduino Lab.
You can debug using print statements in the Console.
Solo Mode: After initial testing
Copy main.py to the Arduino drive via File Explorer or Finder.
Arduino will run the code independently of the laptop (unplug USB).
No Console output is available in solo mode.
Running the Test Code
Use the main.py, nanonav.py, and ble_advertising.py from the starter zip to verify your Arduino:
You should have copied the files to the Arduino drive. Now, run the code in Laptop Mode by clicking Run in Arduino Lab while you have the main.py file open and the Arduino connected via USB.
The wheels should spin forward and backward.
The Serial Monitor should display encoder values.
Using your phone’s BLE scanner, find a peripheral named “NanoNav” or “MPY Nimble”. Write a character to the characteristic; the Console should display the ascii value of the character you sent, then send IR sensor values.
If everything works, your kit is functional. Otherwise, check the Troubleshooting guide.
MicroPython
MicroPython is similar to Python, but some standard libraries may not be available.
You can import modules like time, but not Queue or some PyPi packages.
Helper functions are provided for Arduino, BLE, and peripheral control.
Documentation: MicroPython Docs
Next Steps
Now that your Arduino is running MicroPython, you can start coding:
Modify main.py to experiment with the nanonav library.
Explore guides for using Bluetooth, controlling Movement, and reading Sensors.